Part 1: Getting Started with Deductions#
In Proofscape, all theorems, proofs, and expansions on proofs are represented in what we call deductions. This first part of the tutorial guides you through starting a new Proofscape repo (a git repo consisting of Proofsacpe files), and writing your first deductions in PISE, the Proofscape Integrated Study Environment.
Start a new repo#
We assume that you have already installed and started PISE, following the
Basic Operation of the Proofscape ISE guide. Note: While that guide refers to the installation directory
as PISE_ROOT, in this tutorial we assume the root is ~/proofscape. If you installed
somewhere else, be sure to adjust the commands accordingly.
For the purposes of this tutorial, we’ll assume that you want to share your Proofscape repo
on GitHub (you don’t actually have to), and we’ll be using example as our GitHub username.
Be sure to substitute your actual GitHub username if you do want to upload your repo.
Since we’ll be proceeding as if our repo
belonged to the user gh.example (see Libpaths), it belongs in the directory
~/proofscape/lib/gh/example on your computer. So go ahead now and make sure that that
directory exists (or again, replace example by your actual GitHub username, if you want).
Note that this lies under the Proofscape “library” directory ~/proofscape/lib,
which you should already have, if you have started PISE.
Now we can go to the command line,
form a new tutorial directory, and initialize it as a git repo:
$ cd ~/proofscape/lib/gh/example
$ mkdir tutorial
$ cd tutorial
$ git init
Finally, form The root module, add it, and make an initial commit:
$ touch __.pfsc
$ git add .
$ git commit -m "Initial commit"
That’s all the setup we have to do at the command line, to get a new Proofscape repo started. Next we can go into PISE, and start writing modules.
Note
At https://github.com/pfsc-example/auth-tut, you can find a version of the Proofscape repo that we’ll be building in this tutorial, complete with tags marking various steps along the way. You can use this as a reference, but be sure to build your own copy of the repo as you follow the steps of the tutorial, as this is the best way to learn!
Make a new pfsc file in the editor#
It’s time now to go into PISE. Again, if you haven’t already started PISE, follow Basic Operation of the Proofscape ISE to get it started.
In PISE, find the sidebar on the left, and under “Library” enter
gh.example.tutorial in the text box, and hit Return or click the “plus” (“+”)
button beside the text box.
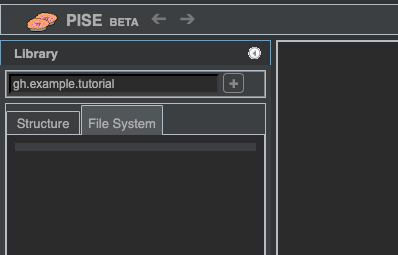
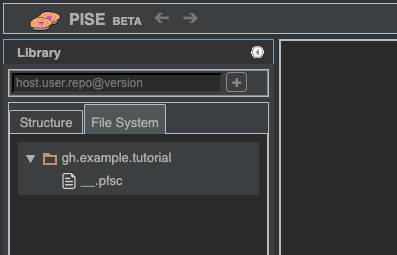
The root directory and root module of your Proofscape repo should now be visible.
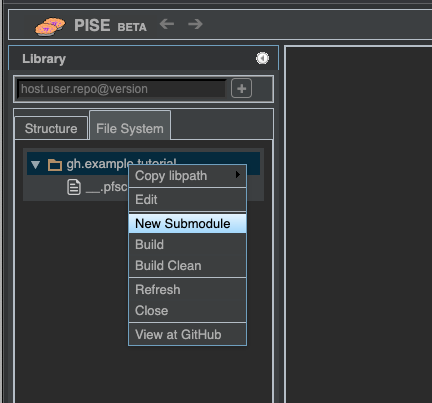
Right-click the root directory, and select New Submodule.
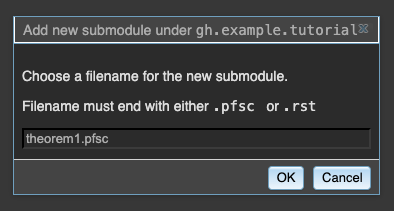
Type the filename theorem1.pfsc and click “OK” (or hit Return).
Edit a file#
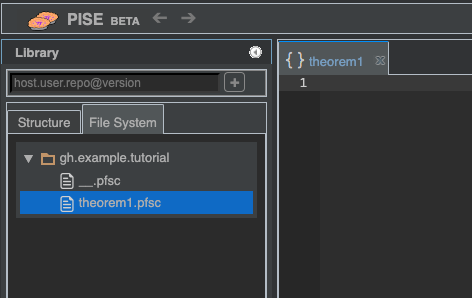
The new theorem1.pfsc file should now be visible in the sidebar.
Double-click it, and the file should open in a text editor panel in the main workspace.
Enter the following text in the editor, as the contents of your new file theorem1.pfsc:
 1deduc Thm {
 2
 3    asrt C {
 4        en = "Some amazing theorem statement."
 5    }
 6
 7    meson = "
 8    C.
 9    "
10}
11
12deduc Pf of Thm.C {
13
14    asrt R {
15        en = "Something self-evident"
16    }
17
18    asrt S {
19        en = "An easy consequence"
20    }
21
22    meson = "
23    R, so S, therefore Thm.C.
24    "
25}
Here we’ve defined two deductions, representing a (phony) theorem and proof. The full syntax for deductions is covered in the Deductions reference.
Build#
In Proofscape, you define things like deductions in source files, as we’ve just done, above. In order to turn this source code into something useful, you have to perform a build. Each time you make changes to your source files, you have to rebuild.
You can initiate a build in PISE in several ways. You can:
Right-click anywhere in the editor panel where you wrote your source code, and click “Build”.
Hit Ctrl-B when any editor panel has focus, i.e. when you have a blinking cursor in an editor panel.
Right-click any file or directory shown in the “File System” view in the sidebar, and select a build option. It doesn’t matter which file (or directory) you click, since all files having changes since the last build of this repo will be rebuilt.
Go ahead now and initiate a build by any one of the means described above.
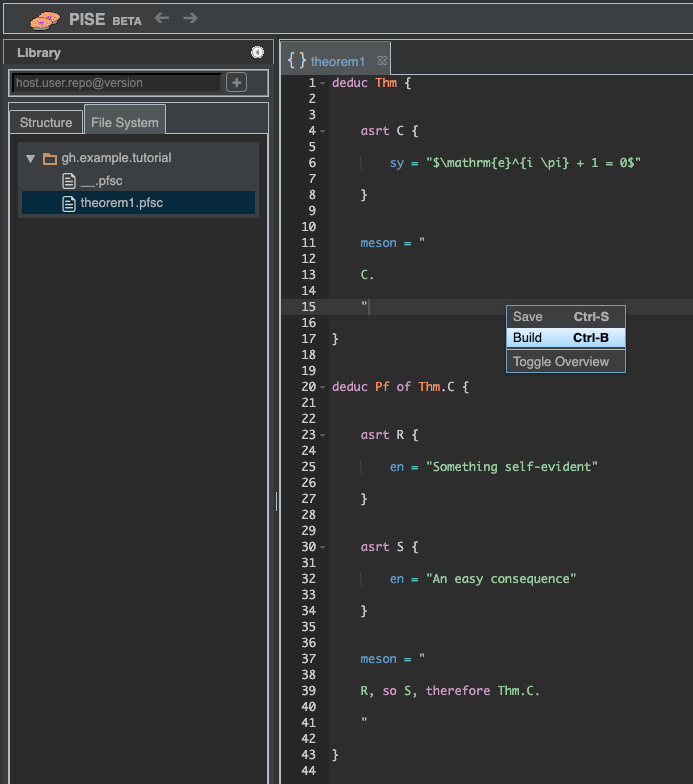
Fig. 2 Initiating a build via right-click in an editor panel#
Note
If you right-clicked to build, you may have noticed that the context menu also offers an option to save (and that you can also save by pressing Ctrl-S). This is useful any time you want to save without building, but there’s no need to do it before you build. When you request a build, PISE automatically saves all open files before it starts the build process. PISE also implements auto-save: It automatically saves all open files every few seconds.
While your Proofscape repo is building, you should see a progress monitor at the bottom of the screen. Since your repo doesn’t have much in it yet, the build should be relatively quick.
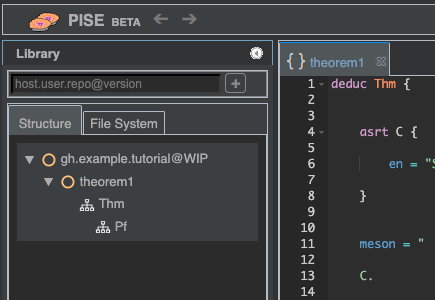
After the build completes, click the “Structure” tab in the sidebar, which
should now have some rows in it, showing the products of the build.
Click the “down arrow” icon next to theorem1, and you should see
the theorem (Thm) and proof (Pf) that you just built.
Double-click the proof (Pf), and it should open (along with the
theorem it proves) in a new panel, covering the editor panel. Panels displaying
proof diagrams are called chart panels.
They are one of the basic Content Types of Proofscape.
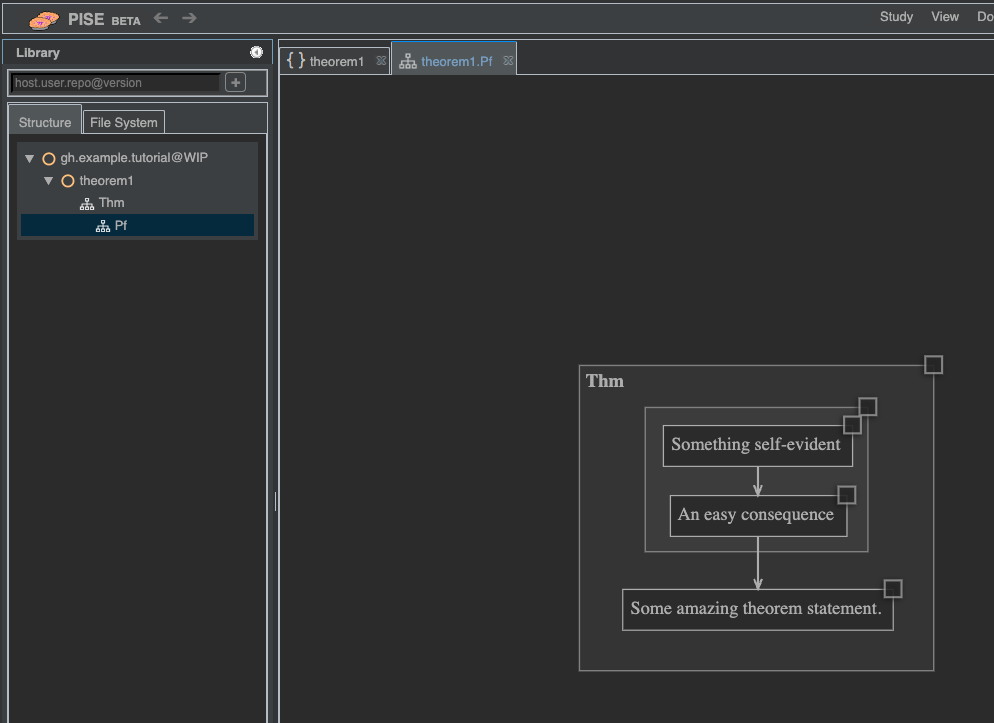
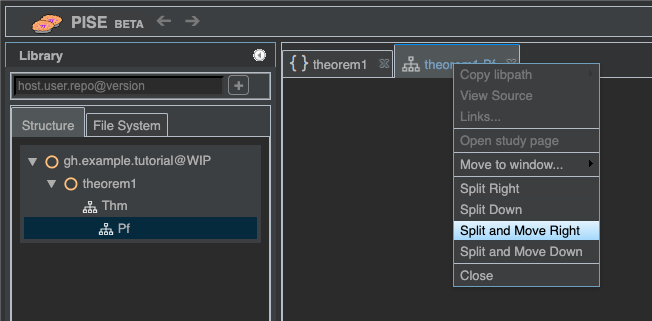
Right-click the chart panel’s tab (click on the tab itself, up at the top, not in the panel’s main area), and select “Split and Move Right”.
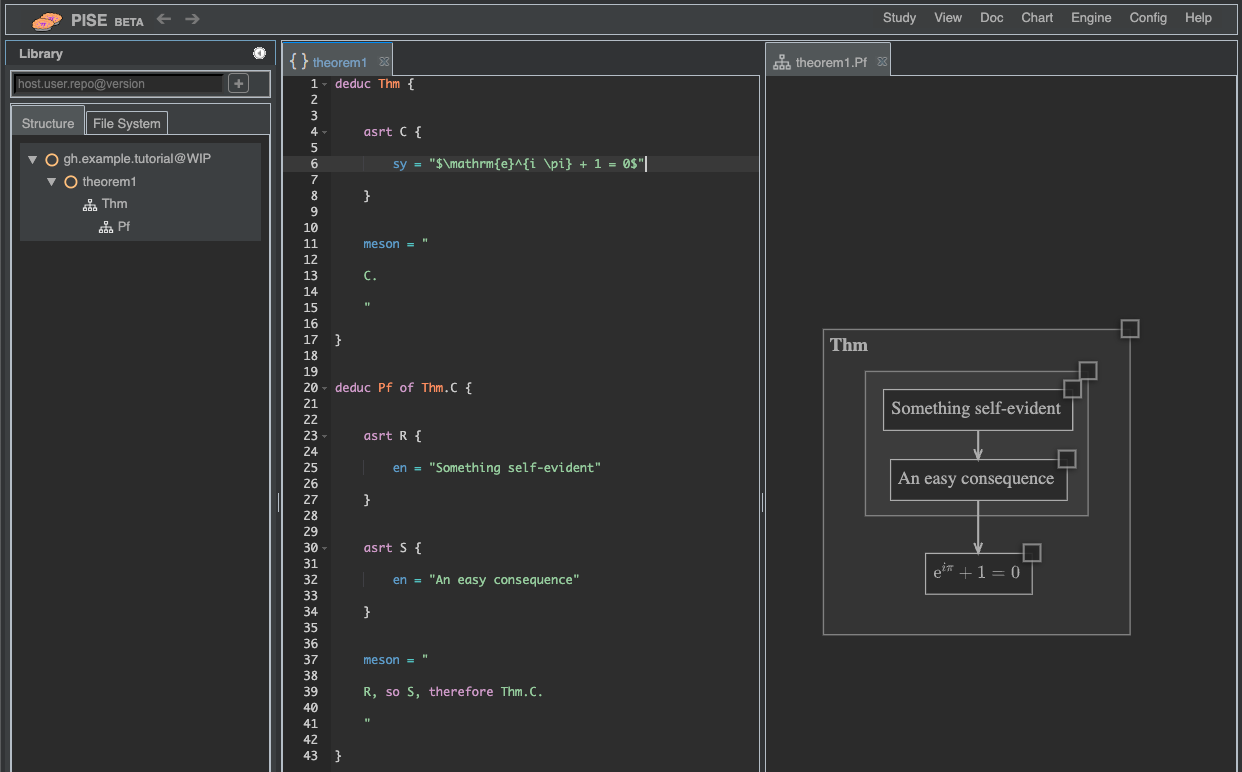
Now you should see the two panels, editor and chart, side by side. Click and drag the background of the chart area to recenter the theorem and proof, as necessary.

Rebuild#
Now let’s change some node text in the editor panel. For example, go to the
definition of node C in Thm, and change the label to contain
some actual mathematics:
deduc Thm {

    asrt C {
        sy = "$\mathrm{e}^{i \pi} + 1 = 0$"
    }
(Note, we’ve also changed the left-hand side of the label assignment to
sy instead of en since it’s now a purely symbolic label, containing
no English language. It would still build if you didn’t do this, but it’s
best to be as accurate as possible. See TeX labels.)
Then once again right-click inside the editor and select “Build” (or just hit Ctrl-B). After the build completes, the chart should automatically update to show your new theorem statement.
Summary#
You have learned how to:
Start a new Proofscape repo at the command line
Create a new Proofscape module in PISE
Edit a module
Build a repo
Open the built products
Arrange panels side by side
Rebuild, with automatic update of built products