Linking#
In PISE, you can browse three different Content Types (C, N, D),
as well as trees (T):
(
C) Charts (diagrams of theorems and proofs)(
N) Notes (annotation and Sphinx pages)(
D) Documents (PDFs and other archival document formats)(
T) Trees (structure views in the sidebar, showing everything defined in a Proofscape repo)
and these things can be linked to each other in various ways, as described in Table 1.
|
A discussion navigates a proof diagram. |
|
A discussion points to and highlights text in a document. |
|
Clicking a node in a proof navigates to the corresponding point in that proof as it appears in a document. |
|
Clicking words that have been highlighted by a discussion navigates to that point in the discussion. |
|
The label for a node is generated from a document, and/or clicking that point in the document navigates to that node in a chart. |
|
When a document is linked to a tree, every highlight defined in that tree is loaded into the document, and clicking will cause charts and notes pages to open and navigate. |
As you can easily imagine, if you had all three content types open at once
(C, N, and D),
it might get tricky to ensure that all the automatic navigations were happening
where and when you wanted them to, especially if you had multiple views open for
a given chart, say, or notes page.
Luckily, PISE gives you easy ways to control “what navigates what,” a topic we refer to as content linking, or just linking for short.
In this tutorial we walk through an example scenario in which you will:
Accept default links
Change a link
Make multiple links
Remove a link
Link to a tree
Getting started with default links#
Let’s start by opening some content in PISE. We’ll use the same Proofscape repo that we build in the Tutorial for Authors. If you’re running PISE on your own computer, you can load this repo now by entering
gh.pfsc_example.auth_tut@v0.1.5
in the text box at the top of the Library sidebar. Or, if you prefer to work online, you can instead simply navigate your web browser to:
https://pise.proofscape.org/?sd=271&tt=b&c=gh.pfsc_example.auth_tut@0_1_5~b.
and work there.
Once the repo is loaded in PISE, go to the sidebar, expand the primes module,
and double-click the Guide annotation under that. The Guide anno should now
open a notes panel.

Next, click the text, “the number \(N\)” of the first doc widget in this notes panel. A doc panel showing a PDF should open beside the notes panel.
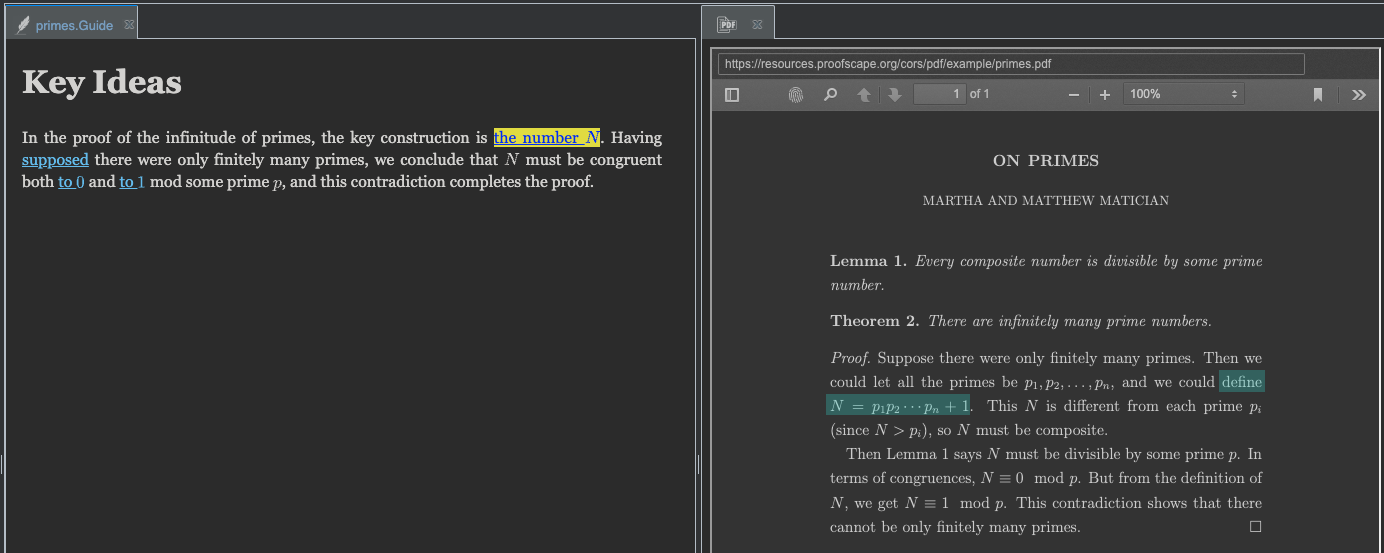
Try clicking the different doc widgets in the notes panel. Each time you click, a corresponding highlight appears in the PDF. We describe this state of affairs by saying that the notes panel is linked to the doc panel, or that it navigates the doc panel.
Note
Since this particular PDF is only half a page long, there may not appear to be much “navigation” happening, but a multi-page document will automatically scroll to show highlights, meriting the name “navigation.”
Tip
When the document is long enough to automatically scroll to show highlights, you can hold Alt while you click a doc widget, to prevent it from scrolling.
You may also notice that, when you hover your mouse pointer over a doc widget, the tab at the top of the PDF panel glows slightly, to let you know that this is where navigation is going to take place.
Schematically, and in terms of the link types described in Table 1,
we may say that we have an N --> D link, from the notes panel to the doc panel.
Conversely, try now hovering your mouse pointer over the lines of the proof, in the doc panel.
As you come to the text that has been selected by the doc widgets in the Guide annotation,
the text is highlighted and the cursor changes. When you click, you select the corresponding
doc widget in the notes panel. So, as you can see, we also have a D --> N link, going in
the other direction.
The two links that we currently have, N --> D and D --> N, are each examples of
a default link: a link that was formed by PISE without you having to ask for it. While the
exact rules for how and when default links are formed are somewhat complex to describe precisely,
the basic idea is simple: Whenever a new content panel is opened, PISE looks for any new links
that could be established between this panel and any existing ones, and it tries to pick a good
link in each possible direction.
Default links are thus generated according to a heuristic built into PISE. No heuristic can always do exactly what you want, in all situations, so you need a way to control linking manually, i.e. to add and take away links yourself. In the following sections, we show you how to do that.
Terminology#
Before we go any farther, let’s make sure we have clear ways to talk about the different parts of the PISE workspace.
Above, we have opened two content panels: one notes panel, and one doc panel. (There is a third type of content panel called a chart panel, but we won’t see one of those until later.)
Within each content panel, we have to distinguish two parts, which we call the tab (which you use to select the panel) and the content area (where the content is displayed). See Fig. 1.
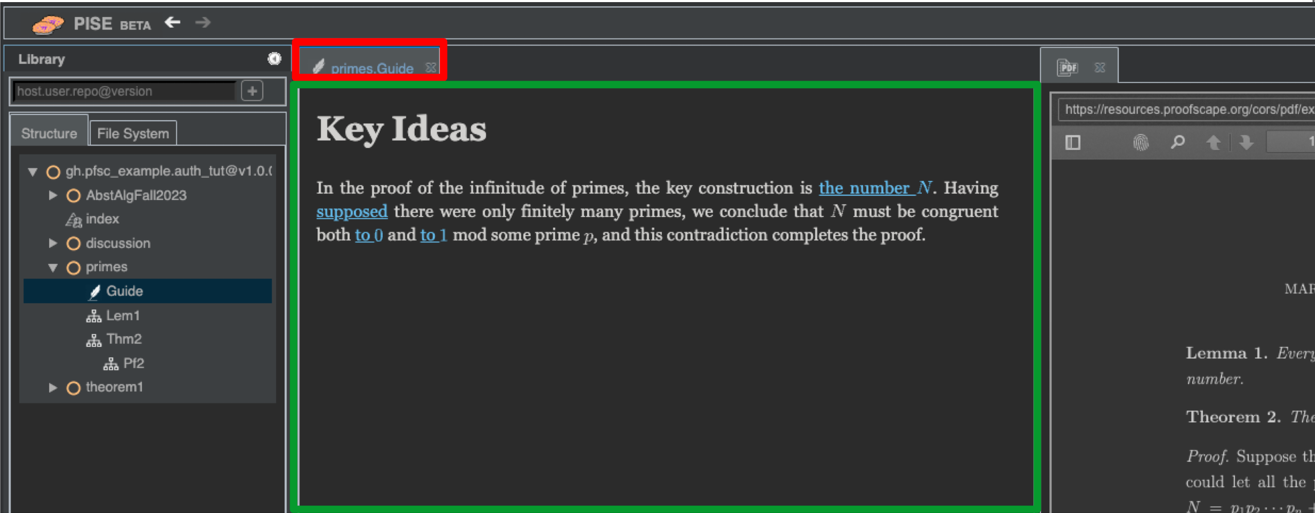
Fig. 1 Notes panel with highlighted tab in red, and content area in green.#
Change a link#
Right-click the tab of the notes panel, and select “Split Down”. You should now have two notes panels stacked one on top of the other on the left-hand side of your workspace, and the doc panel still on the right.
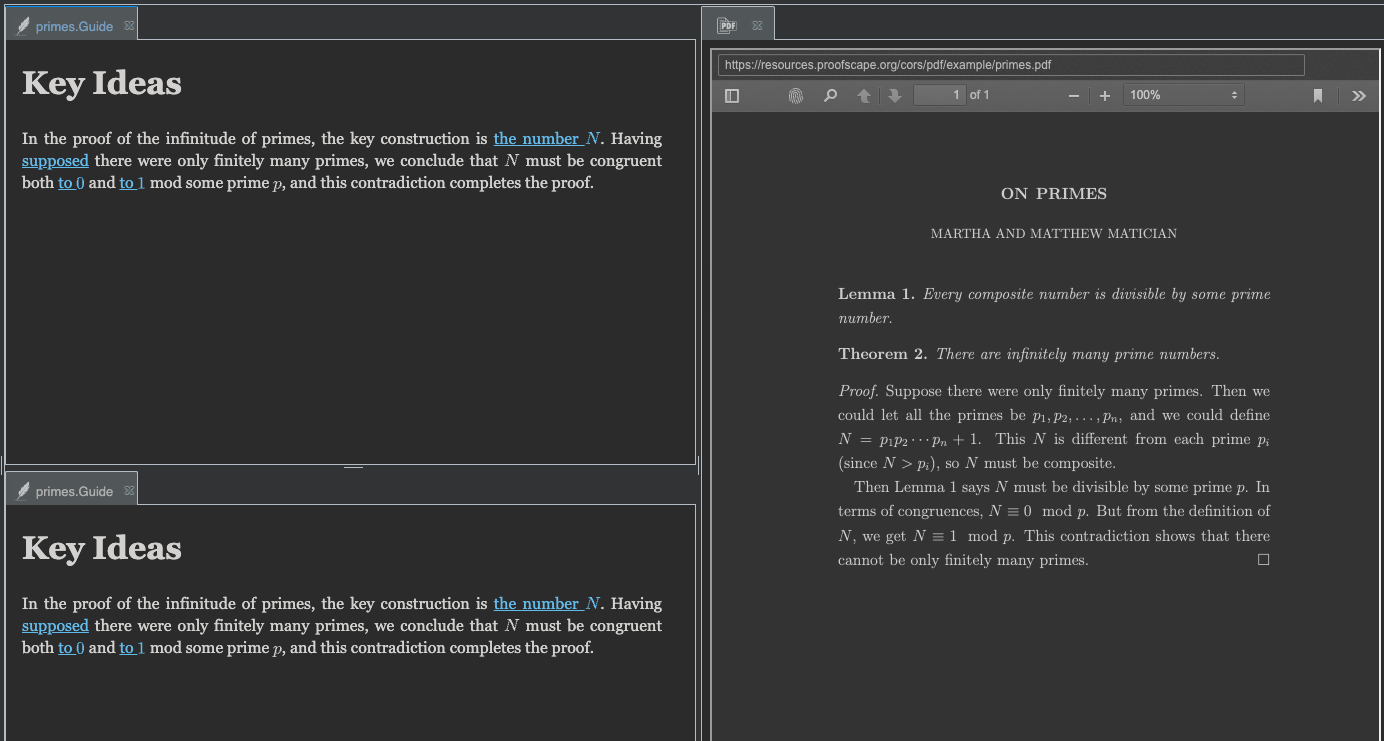
If you interact with the widgets, you can see that both notes panels navigate the doc panel, while the doc panel still just navigates the upper notes panel (the one it was connected to before).
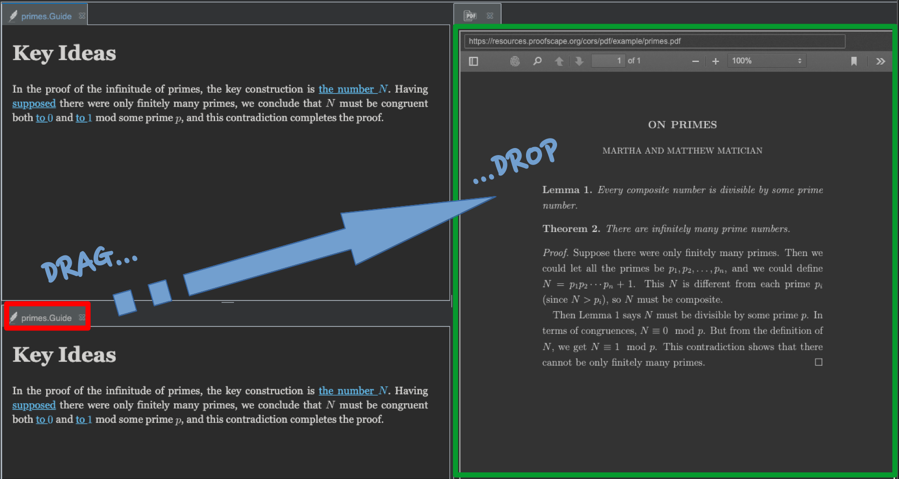
Suppose you instead wanted the doc panel to navigate the lower notes panel. To make that happen, you can drag the tab of the lower notes panel, and drop it onto the content area of the doc panel.
Go ahead and do that now. After dropping, you should get a linking dialog, showing you the new link that you are proposing to form, as well as any existing links, which you can choose to keep or eliminate.
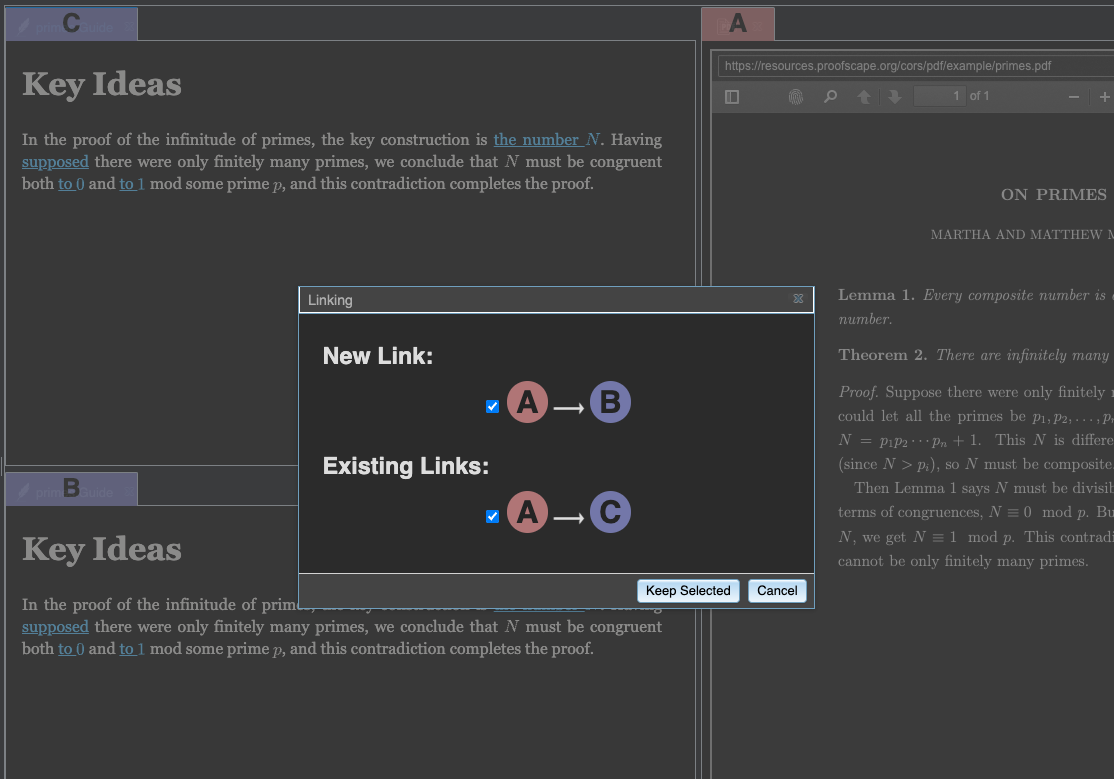
In the background, you can see that letters have been overlaid on each of the existing tabs, so that the linking dialog can meaningfully describe all the possible links.
Click the existing link, so that its box becomes unchecked. Then click the “Keep Selected” button, to close the linking dialog.
Now once again try clicking highlights in the doc panel, and you can see that they now navigate the lower notes panel instead of the top one.
Make multiple links#
Next let’s make the doc panel navigate both of the notes panels. Since it’s already navigating the lower panel, we just need to drag the tab for the upper panel and drop it onto the content area of the doc panel. Again we get a linking dialog.
This time, leave both the new and existing links checked, and click “Keep Selected” to close the dialog.
Now when you click highlights in the doc panel, both notes panels are navigated.
Remove a link#
The drag-and-drop action we’ve been using so far is all about establishing a new link. So, if all you want to do is take away an existing link, we need another way to do that. We need a way to call up a list of existing links, and edit it.
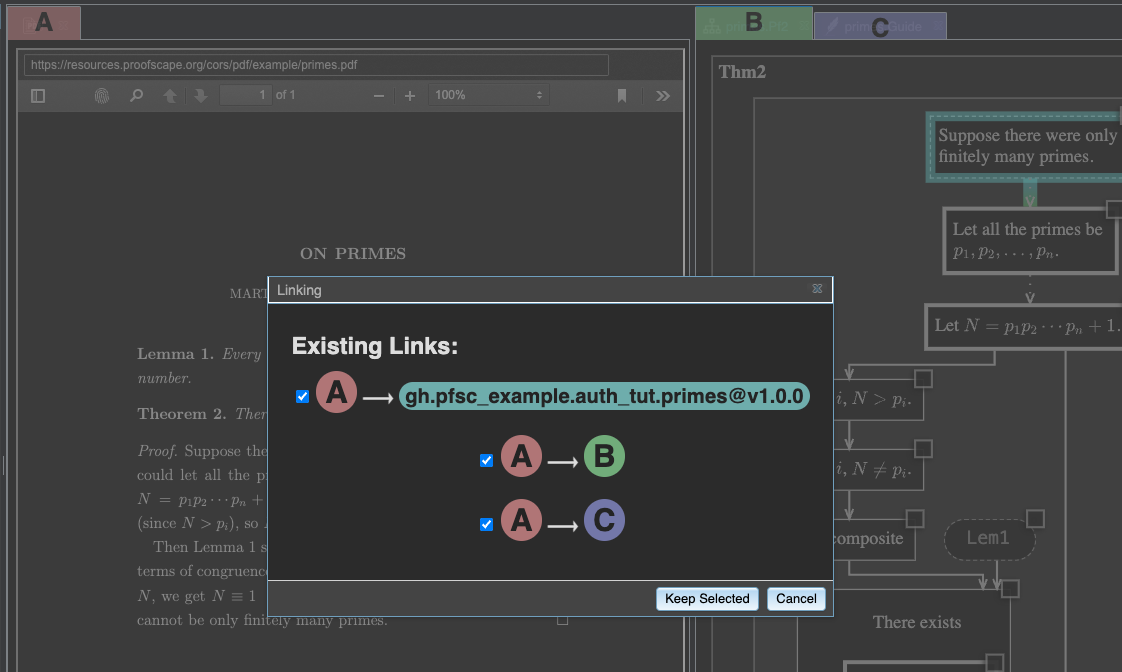
Suppose, for example, we no longer want the doc panel to navigate both notes panels. To achieve that, right-click the doc panel’s tab, and click the “Links…” option.
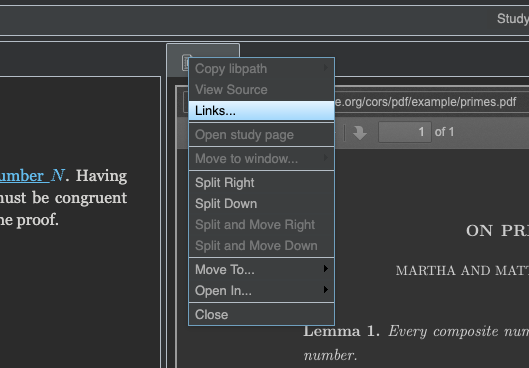
Again we get a linking dialog, this time showing just the existing links out of this panel.
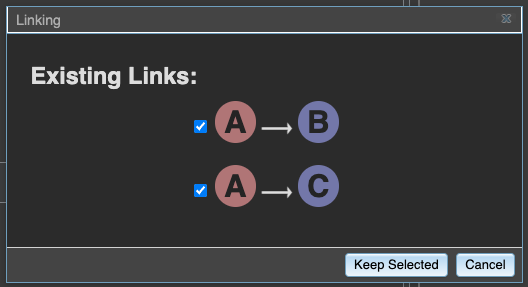
Uncheck the link from the doc panel to the lower notes panel, and click “Keep Selected” to close the dialog.
By clicking highlights in the doc panel, confirm that the linking is once again only to the upper notes panel.
Link to a tree#
Next, keep the doc panel open, but close both of the notes panels. As you now hover your mouse over the proof in the PDF, you can see that it is no longer linked to anything.
Suppose you wanted your notes to be discoverable by someone browsing the PDF,
who had not already opened those notes. This can be set up by establishing a link
of type D --> T, from a doc panel to a tree.
By a tree we simply mean any subtree of a Proofscape repo that is open in the “Structure” view in the sidebar in PISE. The mechanism for establishing a link is again drag-and-drop.
Find the primes module in the sidebar (which has the Guide annotation,
as well as three deductions, Lem1, Thm2, and Pf2 under it).
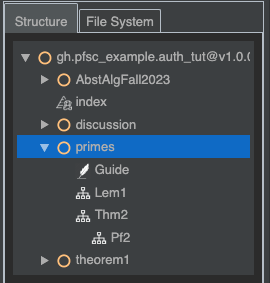
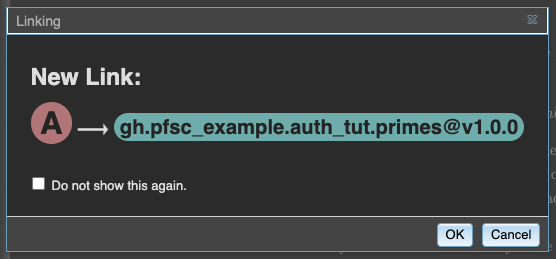
Click and drag the primes module from the sidebar, and drop it onto the
content area of the doc panel. You should once again get a linking dialog.
Click “OK” to accept the proposed link.
Now, as you hover your mouse over the lines of the proof in the PDF, you should see a lot of highlights lighting up, as well as a couple of different mouse cursors, depending on which highlight you are over.
The mouse cursor looks like a curved arrow when you hover over a highlight that
has exactly one supplier in the linked tree. The supplier is highlighted in blue,
in the sidebar. Find a highlight whose sole supplier is the Pf2 deduction,
and click it. The Pf2 deduction opens in a new chart panel.
The mouse cursor instead suggests a context menu when you hover over a highlight
that has more than one supplier in the linked tree. When you click (left-click, not
right-), you get a context menu. Hovering over each option in the context menu,
the corresponding supplier is again highlighted: in the sidebar if it is not yet open,
in its own tab if it is already open. Find a highlight that has the Guide annotation
as one of its suppliers, and click to open this in a new notes panel.
If you now right-click the doc panel’s tab and select the “Links…” option, you can see that the doc panel is linked to both the chart and notes panels that you opened, and is still linked to the tree as well.
Close the linking dialog without making any changes (you can just click the “Cancel”
button), and then close the chart and notes panels too, leaving only the doc panel still open.
If you once again hover your mouse over the proof in the doc panel, you see that the
tree link D --> T is still in effect. Closing the other panels did not take this away.
The drag-and-drop metaphor#
If there is any trick to using drag-and-drop linking in PISE, it’s remembering the direction of the link that’s established when you drop a tab onto a content area. Which panel will control which?
Here are a few memory aids that might help. Pick one that works for you, or make up your own.
Remember that “TAb = TArget, CONTent = CONTroller.”
Make up a story: You are telling the interactive elements that live in a content area, “I want you to control this tab.”
Ask yourself, “How does tree linking work?” Here it’s obvious that the thing you drag and drop (a tree node) must be the target. But the rule is consistent: The thing you drag and drop is always the target.
Summary#
In this tutorial, you have learned the basics of content linking in PISE. You’ve learned about the default links that PISE makes on its own, as well as the basic techniques for controlling the links manually, which include:
Drag and drop a tab onto a content area. (The tab is the target, the content is the controller.)
Drag and drop a tree item onto a content area.
Right-click a tab, and select the “Links…” option, to edit existing links.